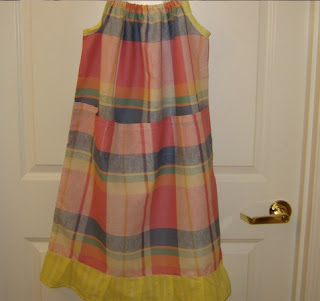
One of my newest sewing ladies, Marcia, sent me this helpful tutorial this week. It shows step by step how to make a pillowcase dress for girls using a sham pillowcase. You know the ones- it's opening is split in the back near the center. Usually, I cut them all apart and piece them back together to make the dress. She however has a unique way of putting the dresses together in less steps and with a row of pockets! Sew cute! As Marcia says, "It takes a little longer to complete a dress using pillow shams,
but they do come in pretty patterns and make attractive dresses. I love
to recycle!!
"
 | |||
| Example of a pretty SHAM dress |
Step 1:
 |
| Remove stitching around perimeter of sham (usually 3 inches from edge of sham). |
Step 2:
 | |
| Turn sham over; the back becomes the front of the dress. |
Step 3:
 |
| Trim off bottom of sham to open it up. |
Step 4:
 |
| Turn inside out and stitch overlap to dress front (sham back). Don't stitch all 3 layers together! |
Step 5:

That is sew Cute! I have a couple of shams in my sewing stash going to have to try!
ReplyDeleteDonna Snider
Great idea-what kid doesn't like running around putting stuff in pockets? A friend of mine that just delivered hundreds of dresses to Haiti told me the kids really wanted the dresses that had pockets!
ReplyDeleteOn additional step which will be helpful: after completing Step 4, turn the dress right side out and stitch vertically across the wide pocket to separate it into 2, 3 or 4 narrower pockets. That way the wide pocket won't 'gap' out.
ReplyDeleteHave fun!
Marcia
Marcia here: Oops, that additional step should come after Step 5, not Step 4 as I said in the previous comment.
Delete